Wednesday, May 28, 2025

Harnessing Power Tools for Optimal Deck and Frame Construction: A Comprehensive Guide

 Harnessing Power Tools for Optimal Deck and Frame Construction: A Comprehensive Guide


Building a deck or framing a house can be both exciting and overwhelming. Whether you are a seasoned contractor or a passionate DIYer, having the right power tools is essential for a successful construction project. This guide delves into essential power tools, focusing on saws and drills that you will need to create strong wood structures, with a special emphasis on building a backyard garage.

The Importance of Power Tools in Construction

Power tools have completely changed the way we handle construction projects. They allow for quicker and more accurate work compared to traditional hand tools. For example, using a circular saw can reduce cutting time by about 50% compared to manual saws. With the right tools, you can save time and produce higher quality results, which is crucial for outdoor structures like decks and garages where strength and durability are non-negotiable.

Essential Power Tools for Deck and Frame Construction

For any deck or frame construction project, having the right tools at your disposal is essential. Here are the most important tools you will need:

Saws

Saws play a critical role in any construction project involving wood. Here’s a breakdown of some commonly used types:

  1. Circular Saw

    A circular saw is highly versatile, ideal for making straight cuts in lumber. It is portable and can tackle different types of wood, making it a favorite among builders. For instance, this tool can be used to cut 2x4s for framing or plywood for decking.

  2. Miter Saw

    This saw excels at making angled cuts, which are especially useful for creating joints in decks. A miter saw can help create precise 45-degree angles for corner joints, ensuring that your deck is both attractive and functional.

  3. Table Saw

    A table saw is crucial for ripping larger sheets of wood into precise dimensions. This is especially important for preparing deck boards that require uniform thickness and width, which can affect the overall appearance and stability of your structure.

Drills

Drills are vital for fastening materials together and ensuring structural integrity.

  1. Cordless Drill

    A cordless drill is crucial for driving screws and performing light drilling tasks. With the freedom of movement it offers, you can easily reach tight spaces without dealing with cumbersome cords. It is invaluable for securing deck boards or framing components.

  2. Hammer Drill

    If you encounter tougher materials like masonry or concrete, a hammer drill is essential. This type of drill combines standard drilling with a hammering action, making it easier to penetrate hard surfaces. For instance, a hammer drill is perfect for installing anchors on concrete for a robust deck frame.

Prioritizing Safety: Essential Precautions

Safety should always be at the forefront when using power tools. Here are some key safety tips:

  • Wear Protective Gear: Always use safety goggles and earmuffs to safeguard your eyes and ears from debris and noise. Statistics show that over 30,000 eye injuries occur each year due to construction work.

  • Inspect Tools Regularly: Before use, always check your tools for any signs of wear and tear. Faulty equipment significantly increases the risk of accidents and injuries.

  • Follow Manufacturer Instructions: Each tool comes with specific operating guidelines. Read and understand these instructions to ensure safe usage.

Planning Your Project: A Case Study in Backyard Garage Construction

Let’s take a closer look at a practical example: building a backyard garage. A well-planned construction project not only facilitates smooth operations but also enhances the final results.

Layout and Design

Before you even pick up a tool, sketching out your garage design is crucial. Consider factors like size, door placement, and window designs. For example, a typical one-car garage often measures around 12x20 feet, while a larger two-car garage might be 20x20 feet or more. Visualizing your space helps you gather the necessary materials and tools.

Organizing Your Construction Site

An organized construction site can greatly improve workflow and productivity. Set up designated areas for tool storage, material staging, and waste disposal. Studies show that effective organization can improve efficiency by about 30%. This makes it easier to find tools and materials, ultimately saving you valuable time.

Step-by-Step Process for Building the Garage

Building a garage typically involves several fundamental steps:

1. Gather Materials

Start by creating a comprehensive list of required materials, including various types of lumber, nails, and necessary supplies. This list ensures that you have all your power tools ready for efficient work.

2. Prepare the Foundation

The foundation is key to stability. You might choose between a concrete slab or wooden pier foundation, depending on local regulations and soil conditions. Using your circular and miter saw, cut wood to the specified lengths for framing the foundation.

3. Frame the Structure

Once the foundation is set, use your circular saw and cordless drill to frame the garage. This includes constructing walls, floor joists, and roofing supports. A well-framed structure should be square and level to prevent future issues.

4. Install Siding and Roofing

With the frame in place, it’s time to install siding and roofing. Use your hammer drill for securing heavy-duty fasteners to keep everything in place. This step is crucial in protecting your garage from the elements.

5. Final Touches

Finish up your project by adding doors, windows, and any additional features that enhance the garage's functionality and aesthetics.

A newly built garage showcasing sturdy wood construction.

Maintaining Your Power Tools

To ensure longevity and peak performance, maintaining your power tools is necessary. Here are some practical maintenance tips:

  • Clean After Use: Cleaning tools after use removes wood dust, debris, and other materials that can cause damage over time.

  • Schedule Regular Maintenance: Regular maintenance checks can replace worn-out parts, ensuring that your tools always function properly.

  • Store Properly: Store tools in a dry location, preferably in a toolbox or on shelves, to protect them from the elements.

Final Thoughts

Integrating power tools into your deck and frame construction tasks can revolutionize your building experience. Understanding how to use saws and drills effectively will lead to better outcomes and help bring your construction vision to life.

Whether you are building a cozy backyard deck or a robust garage, the tools you choose have a significant impact on both productivity and the quality of your finished project. Take the time to select the right tools, plan carefully, and execute your work with precision. Start building your vision today!

A well-organized backyard construction site with tools and materials.


In-depth view of power tools prepared for deck construction.

Monday, May 26, 2025

Crafting a Pavillon Wood Structure: Expert Insights on Geometry and Design for Detached Yards

 Creating an inviting and functional outdoor space can greatly enhance your home’s enjoyment and overall value. A well-designed pavillon wood structure serves as a charming feature that not only provides a sheltered area for relaxation and entertainment but also enriches the aesthetic appeal of your detached yard. By mastering the geometric principles behind pavillon design, you can simplify the construction process and achieve a stunning transformation that seamlessly integrates with your home.

Understanding the Basics of Pavillon Structures

A pavillon typically comprises a framework of posts and beams, forming a sturdy and visually pleasing structure. The roof can be flat or sloped, contributing to both its functionality and aesthetic value. The geometry involved is essential for stability and longevity. For example, when constructing a 12-foot by 12-foot pavillon, ensuring proper angles and load distribution during design is crucial to withstand weather conditions, such as heavy rain or strong winds.

The posts, serving as vertical supports, are usually anchored securely to the ground, while the beams act as horizontal supports that transfer the weight from the roof to the posts. Understanding how to connect these key elements while considering overall shape is vital for a successful build.

The Geometry of Posts and Beams

The Role of Posts

Posts are often square or rectangular and serve as the primary vertical supports for the pavillon. The dimensions of these posts determine their load-bearing capacity. For instance, a standard 6x6 cedar post can support up to 1,000 pounds when properly installed.

Choosing materials wisely is essential; cedar is a favorite due to its natural resistance to decay and pests. Each post should be set deeply into the ground, roughly one-third of its height, ensuring stability against wind and weather.

Beam Configuration

The beams are just as important, connecting two or more posts and forming the structural framework. Selecting the right type of beam is critical. For example, a rectangular beam is typically used for a flat roof, while an I-beam configuration might be necessary for a sloped roof to enhance strength and load capacity.

For a pavillon with a sloped roof, you might use beams measuring 2x8 inches, angled to promote water runoff. These considerations ensure that your structure is not just beautiful but also stable.

Image Placeholder 1:

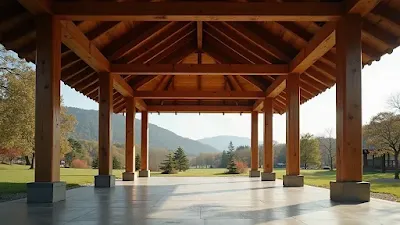
Eye-level perspective showcasing the wooden beams of a pavillon structure

Bonding the Structure

The connection between posts and beams is pivotal. Traditional joints like mortise and tenon or lap joints provide strength and allow some flexibility to adapt to environmental stresses. Understanding angles, load distribution, and the materials used is fundamental for a robust construction. Professional carpenters often use tools such as pocket hole jigs for precise fitting, ensuring durability.

The Roof Design: A Geometry-Driven Approach

The roof shape is not just an aesthetic choice; it also impacts functionality. Popular roof types include gabled, hipped, and flat, each affecting water drainage and structural stability.

For instance, a gabled roof, characterized by its two sloping sides, effectively directs water away, minimizing mold growth and decay. If you choose a flat roof, it's vital to incorporate a slight slope to facilitate drainage. Data shows that structures with adequate slopes have up to 30% less water-related damage compared to those without.

Image Placeholder 2:

High angle perspective emphasizing the gabled roof design of a wooden pavillon

Practical Considerations for Building a Pavillon

When planning your pavillon wood structure, keep several key factors in mind:

Local Regulations

Check your local building codes and regulations regarding outdoor structures. Permits are essential to comply with safety standards and avoid future complications. In some neighborhoods, permits for structures larger than 150 square feet may be required.

Material Selection

Opt for high-quality, weather-resistant timber that aligns with your design vision and budget. For example, pressure-treated pine can offer good longevity at a lower cost, while using hardwoods like mahogany or teak can provide exceptional durability but at a higher price point.

Functionality and Use

Think about how you will use the pavillon. Will it be a tranquil reading nook, an entertainment area, or a workspace? This understanding will influence its size and shape, as well as what amenities you might want (e.g., lighting, built-in seating, or landscaping features).

Image Placeholder 3:


Wide angle perspective of a completed wooden pavillon set in a landscaped yard

Final Thoughts

Constructing a pavillon wood structure goes beyond mere assembly; it requires a solid grasp of geometry and design principles. By thoughtfully considering posts, beams, and roof shapes, your pavillon can be both a beautiful centerpiece and a practical addition to your outdoor space. Whether you are a professional carpenter or a homeowner embarking on your first project, understanding the geometry involved will greatly enhance your outcomes.

With the right guidance and knowledge, you can create a stunning outdoor structure that enriches your home life and becomes a cherished gathering place for years to come. 

Saturday, May 24, 2025

Innovative Wood Deck Solutions: Elevating Your Backyard Terrace with Diverse Plank Styles and Materials

Innovative Wood Deck Solutions

Innovative Wood Deck Solutions: Elevating Your Backyard Terrace with Diverse Plank Styles and Materials

Transforming your backyard into a stunning escape is more attainable than ever with the right features. A well-designed wooden deck is a highly appealing addition that not only enhances the aesthetics but also boosts functionality. This article delves into the different types of wood materials and plank styles that can elevate your outdoor space, focusing on their beauty, durability, and upkeep.

The Appeal of a Wooden Deck

A wooden deck extends your living space into the outdoors, making it perfect for relaxing or entertaining visits with family and friends. This versatile structure can create not only more usable area but also a warm ambiance. With numerous materials and styles available, every homeowner can find a deck that meets their personal preferences while remaining durable and long-lasting.

For instance, a wooden deck can increase property value by up to 12%, making it a wise investment.

Selecting the Right Type of Wood

Choosing the right type of wood is crucial for ensuring your deck meets your needs. Various woods come with unique aesthetics, durability, and maintenance requirements. Here are some of the most common options:
  1. Pressure-Treated Pine

    Cost-effective and widely used, pressure-treated pine is popular for decking. It's treated with chemicals to fend off rot and insects, providing a robust option for outdoor use.

    This wood can be left natural or stained to suit your home’s design. However, remember to reapply protective treatments every 1-3 years to maintain its appearance.

    Eye-level view showcasing a pressure-treated pine wood deck amidst landscaped greenery.
  2. Redwood

    Redwood stands out as a beautiful, high-end choice for decking. Its rich reddish-brown color and natural decay resistance mean it can last for decades with minimal upkeep.

    Affordable compared to other premium woods, redwood’s natural oils also deter insects, making it an excellent option for durable outdoor spaces.

  3. Cedar

    Cedar brings its own unique charm to a backyard. Its pleasant scent and beautiful hue are matched by its ability to resist rot and insects naturally.

    This wood needs less maintenance than many alternatives and ages gracefully to a silver-gray finish. You can easily choose between a natural look or a painted style, making cedar adaptable to various tastes.

    High angle view of a cedar wood terrace showcasing areas for relaxation.
  4. Composite Decking

    For those who want a low-maintenance option, consider composite decking, which consists of recycled materials. This style provides a wooden look while incorporating the durability of synthetic products.

    Composite decks are resistant to fading, staining, and warping, thus ensuring long-term enjoyment without the need for constant upkeep. A range of colors and textures also allows for personal touch while minimizing maintenance hassles.

Diverse Plank Styles

Selecting the right wood is just one part of the process; exploring different plank styles is equally important as this choice can dramatically affect your deck’s design. Here are two popular styles:
  1. Standard Plank Layout

    The traditional standard plank layout aligns the planks parallel to one another, offering a classic and simple method of deck construction. This design complements any wood type and allows your chosen material's natural beauty to shine through with ease.

  2. Diagonal Plank Pattern

    For a more visually stimulating appeal, the diagonal plank pattern is worth considering. This layout not only adds uniqueness but can create the illusion of a larger space.

    While it requires more cuts and expert installation, the outcome can greatly enhance the visual impact of your deck.

Maintenance Tips for Longevity

Proper maintenance is vital for keeping your deck looking its best. Here are three essential tips you should follow:
  • Regular Cleaning: Sweep away dirt and debris frequently to prevent damage and maintain a tidy appearance.
  • Sealing and Staining: Apply sealant or stain every 1-3 years depending on the wood type; this will protect against weather and retain color.
  • Inspect for Damage: Regularly check for wear and tear, like splinters or rotting boards, and address any issues swiftly to avoid expensive repairs in the future.

Accessibility and Safety Features

In planning your wooden deck, consider access and safety features that enhance its usability. Think about incorporating railings, lights, and slip-resistant surfaces to improve safety.

Adding wide stairs or ramps ensures everyone can easily enjoy your terrace, increasing its appeal for family members of all ages and abilities.

Transform Your Backyard

Constructing a wooden deck not only enhances your outdoor space but can also significantly elevate your overall property value. With a variety of materials and plank styles, homeowners can craft unique areas that reflect their lifestyle and personal taste.

Whether opting for economical pressure-treated pine, the attractive cedar, or the low-maintenance composite option, every choice you make can create a stunning outdoor retreat. Combining thoughtful design with regular maintenance and safety features will make your terrace an inviting space for relaxation and gatherings.

Embrace the potential of your backyard and create a stylish oasis where memories are made!

Tuesday, May 20, 2025

Transform Your Luxurious Yard with Stunning Terrace Wood Around Your Pool for Unforgettable Summer Moments

 Transform Your Luxurious Yard with Stunning Terrace Wood Around Your Pool for Unforgettable Summer Moments

Creating the perfect summer oasis in your backyard is not just a dream; it can become your reality. A luxurious yard is more than just beautiful views; it’s a retreat for relaxation, entertainment, and enjoyment during those sunny days. One transformative feature that can elevate your outdoor space is terrace wood around your pool. This natural element enhances beauty while fostering a warm atmosphere for you and your guests. Let’s explore the benefits, design options, and maintenance tips for adding terrace wood around your pool.

The Allure of Terrace Wood

Picture this: you step outside and feel the warmth of a smooth wooden deck beneath your feet. Terrace wood provides an amazing connection to nature alongside a stunning visual appeal around your swimming pool. It gracefully reflects the shimmering water and creates a seamless flow from the pool to different areas of your yard.

Terrace wood is also highly customizable to fit your personal style and the vibe of your outdoor area. With a range of colors and finishes available, you can find the perfect hue to complement your landscape design. For example, a rich mahogany might lend a classic elegance, while lighter woods can create a sleek modern feel.


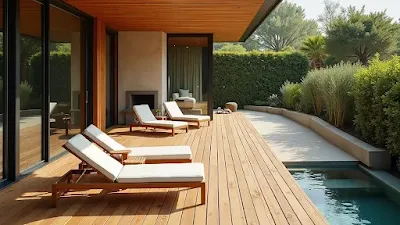
Stunning terrace wood enhances a luxury pool setting.

Benefits of Using Wood Around Your Pool

1. Aesthetic Appeal

One major advantage of adding terrace wood around your pool is its beauty. Wood creates a warm and inviting ambiance, perfect for a personal retreat. According to studies, nearly 70% of homeowners feel that having natural elements in their yards enhances their enjoyment of outdoor spaces.

2. Comfort and Safety

Wooden decking is notably comfortable underfoot. Unlike concrete, which can heat up to unbearable temperatures in the sun, wood stays cooler and pleasant. In a survey, 75% of parents chose wooden decking as a safer option for their kids and pets due to its non-slip surface, reducing the risk of falls around the pool.

3. Versatility in Design

With terrace wood, you can shape your pool area flexibly to suit your tastes. For instance, consider creating a multi-level deck for lounging or designing planters and seating areas. This adaptability allows you to customize your yard into a true sanctuary.

4. Eco-Friendly Option

Opting for sustainable wood brings an eco-friendly dimension to your backyard. Many wood varieties have a lower carbon footprint compared to synthetic alternatives. By choosing responsibly sourced wood, you can create a luxurious yard and contribute positively to environmental conservation.

Choosing the Right Wood for Your Terrace

1. Durability

Durability is essential when selecting terrace wood. Teak, cedar, and redwood are top choices due to their natural resilience against moisture and varying weather conditions. Avoid cheaper woods that can warp or deteriorate quickly; they may cost you more in the long run.

2. Treatment and Maintenance

To ensure longevity, most types of wood require treatments to protect against elements such as UV rays and water. Regularly applying oils or sealants can extend your wood’s lifespan. Maintenance, although a commitment, is crucial to retain its beauty and functionality over the years.

3. Cost Considerations

While premium woods may seem expensive initially, they offer long-term savings. High-quality woods often require less maintenance and are less likely to need replacement. Investing in a well-constructed terrace means you’ll be able to enjoy your outdoor space for many summers.


A smooth wooden deck creating a serene poolside escape.


Design Ideas for Your Poolside Terrace

1. Elevated Decking

If your pool sits at a lower level, consider an elevated wooden deck. This design can transform your pool area into an eye-catching feature while offering stunning views of your yard.

2. Integrated Seating

Maximize your terrace space by adding built-in seating options. Features such as wooden benches or chaise lounges can seamlessly blend into the design, providing a cozy spot for relaxation.

3. Planter Boxes

Enhance your terrace with wooden planter boxes. These not only add beauty but can also help define different areas of your yard. Select plants that thrive in your climate, adding a refreshing touch around your pool.

Maintenance Tips for Your Wooden Terrace

1. Regular Cleaning

Keep your terrace looking its best by regularly cleaning it. Sweeping and power washing can help remove dirt and grime, maintaining both its attractiveness and safety.

2. Inspect for Damage

Be proactive by inspecting your terrace for signs of damage, such as splintering or discoloration. Early detection can help you address issues promptly before they escalate.

3. Seasonal Care

In colder climates, prepare your terrace for harsh winters. Moisture and freezing temperatures can be damaging; consider covering your deck or applying protective treatments to guard against winter effects.


An elegant poolside setting with polished wood finishing.

Final Thoughts

Adding stunning terrace wood around your pool can turn your yard into a vibrant outdoor paradise, perfect for summer moments. Not only does wood elevate the beauty of your space, but it also enhances safety and comfort. By choosing the right materials, exploring various design options, and committing to regular maintenance, you can enjoy your outdoor haven for years.

So step outside, absorb the sunshine, and delight in your beautifully designed terrace. Summer is fast approaching, and it’s the perfect time to start planning your dream outdoor transformation, ensuring countless memories spent in joy and relaxation.

Thursday, May 15, 2025

Transform Your Patio with These Wood Bench DIY Projects

Transform Your Patio with These Wood Bench DIY Projects

When it comes to enhancing your outdoor living space, incorporating wooden benches can bring both functionality and aesthetic appeal to your patio. Wooden benches serve as versatile pieces of furniture that can accommodate various needs, whether you are entertaining guests, enjoying a quiet moment with a book, or simply taking in the beauty of your garden. The natural warmth of wood can create a welcoming atmosphere, making your patio a more inviting place for family and friends to gather. If you are looking to add a personal touch and enjoy a weekend DIY project, transforming your patio with wooden benches is a fantastic idea that allows for creativity and self-expression. By choosing to build or customize your own wooden benches, you not only have the opportunity to select the type of wood that best complements your outdoor decor but also to design the benches in a way that fits perfectly within your available space. Whether you prefer a rustic look with reclaimed wood, a modern aesthetic with sleek lines, or a classic style with intricate carvings, the possibilities are virtually endless.

 Furthermore, engaging in a DIY project can be incredibly rewarding; it provides a sense of accomplishment and pride in creating something with your own hands. Additionally, building your own benches can be a cost-effective solution compared to purchasing pre-made furniture, allowing you to allocate your budget towards high-quality materials or additional enhancements for your patio. You can also personalize the benches by incorporating features such as built-in storage, cushions for comfort, or even a weather-resistant finish to ensure durability against the elements. Moreover, the process of designing and constructing wooden benches can be a fun activity to share with family members or friends, turning a simple project into a memorable experience. You can gather ideas and inspiration from various sources, such as home improvement shows, online tutorials, or even local woodworking classes. This not only enhances your skills but also fosters a sense of community as you share tips and techniques with others who are passionate about DIY projects.

 In conclusion, adding wooden benches to your patio is not just about improving functionality; it is an opportunity to create a beautiful and inviting space that reflects your personal style. The satisfaction derived from transforming your outdoor area with handmade furniture is unparalleled, making it a worthwhile endeavor for anyone looking to enhance their outdoor living experience.


One of the simplest yet charming wood bench projects you can undertake is a classic slatted bench. This design involves using wooden boards to create a seat that is both sturdy and comfortable. Whether you choose to stain the wood for a more polished look or leave it natural for a rustic feel, a slatted bench is a versatile addition to any patio. For those looking to add a touch of elegance to their outdoor space, a curved wooden bench can be a show-stopping feature. By bending wood using steam or specialized techniques, you can create a unique and eye-catching bench that will be the highlight of your patio. Pair it with colorful cushions or throw pillows for a cozy and inviting atmosphere. If you have limited space on your patio, a foldable wooden bench is a practical solution. This versatile design allows you to enjoy the luxury of a bench without compromising on space when not in use. Perfect for small patios or balconies, a foldable wooden bench can be easily stored away or transported for outdoor events. For those with a flair for the unconventional, a tree trunk bench can add a rustic and natural element to your patio. By repurposing a sturdy tree trunk and pairing it with wooden legs, you can create a one-of-a-kind bench that seamlessly blends with the surrounding landscape. Add a pop of color with vibrant cushions or keep it simple with neutral tones for a harmonious outdoor retreat. In conclusion, transforming your patio with wooden benches is a rewarding DIY project that can elevate your outdoor living experience. Whether you opt for a classic slatted bench, a curved design, a foldable bench, or a tree trunk creation, the possibilities are endless. So grab your tools, unleash your creativity, and embark on a woodworking adventure to create the perfect wooden bench for your patio.


Tuesday, May 13, 2025

Ultimate Guide to Building a Wood Pergola in Your Backyard

Ultimate Guide to Building a Wood Pergola in Your Backyard

Are you looking to add a touch of elegance and functionality to your backyard? A wood pergola might be just the thing you need. In this ultimate guide, we will walk you through the steps to help you build a stunning wood pergola in your outdoor space.


Planning and Design

Begin by envisioning how your pergola will enhance your backyard’s functionality and aesthetics. Measure your space carefully to determine the pergola’s dimensions, and define its purpose—whether for hosting guests, creating a shaded lounging area, or complementing your garden’s design. Align the pergola’s style with your home’s architecture, and gather inspiration from design platforms like Houzz, Pinterest, or landscaping magazines to refine your concept.

Materials and Tools

Select durable, weather-resistant materials such as cedar, redwood, or pressure-treated lumber for longevity. Gather essential tools: a power drill, saw, level, concrete mix, and galvanized screws or bolts. For decorative flair, consider ornamental brackets, post caps, or intricate beam designs. Always prioritize quality to ensure structural integrity and visual appeal.

Preparing the Site

Choose a flat, accessible location free of obstructions. Mark the pergola’s footprint with stakes or paint, then dig post holes to a depth of at least one-third the post’s height. Secure posts with concrete, and allow the foundation to cure fully (24–48 hours) before proceeding. Proper site preparation ensures stability and safety.

Building the Framework

Assemble the pergola’s structure by cutting beams and rafters to size. Attach them to the posts using weatherproof fasteners, and check alignment with a level. Add crossbeams or lattice for support and style. Take care to ensure all joints are secure and the framework is balanced.

Personalizing Finishes

Enhance your pergola with climbing plants (e.g., wisteria, ivy), string lights for ambiance, or retractable curtains for privacy. These touches transform it into a cozy outdoor retreat while blending natural beauty with practical design.

Long-Term Care

Protect your pergola with a water-resistant sealant or stain every 1–2 years. Inspect for loose hardware, rot, or weathering, and address repairs promptly. Clean annually to remove debris and maintain its fresh appearance.

Final Thoughts

A wood pergola is a timeless addition to any backyard, offering both charm and utility. By following this guide, you’ll create a durable, eye-catching structure that elevates your outdoor living experience. Get started today and enjoy your custom-built oasis!


Sunday, May 11, 2025

Top 5 Wood Fence Design Ideas for Your Outdoor Space

 Top 5 Wood Fence Design Ideas for Your Outdoor Space


When it comes to enhancing the outdoor space of your home, a wood fence can add both beauty and functionality. Not only does it provide privacy and security, but it also offers a touch of natural warmth and charm to your property. If you are considering adding a wood fence to your outdoor space, here are five design ideas to inspire you:


  1. Traditional Picket Fence: A classic choice for many homes, the traditional picket fence features evenly spaced vertical boards with pointed tops. This timeless design adds a quaint and charming look to your property, perfect for creating a welcoming entrance or framing your front yard.

  2. Lattice Top Fence: For a touch of elegance and sophistication, consider a wood fence with a lattice top. The intricate lattice pattern adds a decorative element to the fence while still allowing airflow and light to pass through. This design is ideal for adding a bit of privacy without completely blocking the view.

  3. Horizontal Slat Fence: A modern and sleek option, the horizontal slat fence offers a clean and contemporary look to your outdoor space. This design features horizontal boards placed close together, creating a sense of privacy while maintaining an open and airy feel. Horizontal slat fences are perfect for giving your backyard a modern update.

  4. Barn Door Style Fence: If you are looking to make a statement with your wood fence, consider a barn door style design. This unique and rustic option features large vertical boards with diagonal cross braces, reminiscent of traditional barn doors. The barn door style fence adds character and charm to your outdoor space, making it a focal point of your yard.

  5. Scalloped Fence: For a whimsical and playful touch, opt for a scalloped wood fence design. This style features boards with curved or scalloped tops, creating a soft and inviting look. Scalloped fences are perfect for adding a touch of personality to your property, whether framing your garden or lining your backyard. No matter which design you choose, a wood fence is a versatile and durable addition to your outdoor space. Whether you prefer a classic picket fence or a modern horizontal slat design, there is a wood fence style to suit every homeowner's taste. Enhance the beauty of your property while adding privacy and security with a beautifully crafted wood fence.