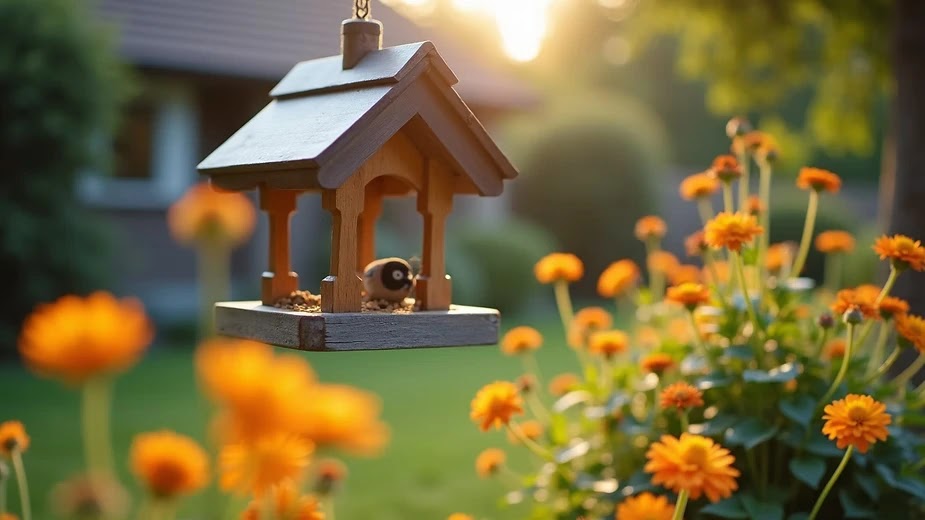
Imagine stepping into your backyard and witnessing beautiful birds fluttering around, chirping cheerfully as they feast. If you're a woodworker or a birdwatching enthusiast, you can easily create a wooden bird feeder that brings these delightful creatures closer. Not only is this DIY project enjoyable, but it also nourishes local wildlife and enhances your appreciation of nature. In this guide, we’ll take you through the steps to build a simple yet effective wooden bird feeder.
Building a bird feeder is a wonderful project that lets you enjoy the sights and sounds of birds. Let’s look into the steps needed to create a charming and functional bird feeder that will attract a variety of species.
Why Build a Bird Feeder?
Creating a homemade bird feeder is both fulfilling and beneficial for the environment. Here are some compelling reasons to consider:
Connection with Nature: When you have a bird feeder, you can see different bird species up close, providing insight into their unique behaviors. In fact, studies show that having a bird feeder can attract up to 20 different species in a single spring season.
Educational Experience: If you have children, building a bird feeder can serve as a great learning opportunity. It teaches kids about wildlife conservation and highlights the importance of biodiversity.
Personal Touch: A handmade bird feeder adds character to your yard, making it cozier while providing a vital resource for local birds.
Now, let’s gather the materials you’ll need for this exciting DIY wooden bird feeder project.
Materials Needed
To create your wooden bird feeder, gather the following materials:
Wood: Untreated cedar or pine, preferably ¾ inch thick. Cedar is often preferred because it can last longer outdoors.
Screws: 1-inch wood screws ensure sturdy assembly.
Wood glue: This adds extra stability to joints.
Sandpaper: Use fine-grit sandpaper for a smooth finish.
Paint or wood stain (optional): Choose non-toxic options to protect the feeder from weather while giving it a personal flair.
Drill: Essential for making holes and driving screws.
Saw: A hand saw or jigsaw will do the job for cutting wood.
Measuring tape: This ensures accurate dimensions for your feeder.
With your materials ready, it's time to look at the dimensions and design of your bird feeder.
Bird Feeder Design and Dimensions
This straightforward design makes assembling your bird feeder easy while inviting a variety of birds:
Base: 10" x 10"
Sides: Two pieces, each measuring 8" x 10"
Front and Back: Two pieces, each measuring 8" x 8"
Roof: Two pieces measuring 12" x 12" (creating a slight overhang offers extra protection from rain).
Design Tips
Choose Dimensions Based on Bird Types: The specified sizes will attract small birds like finches and chickadees. For larger birds like blue jays, consider increasing the dimensions accordingly.
Add Drainage Holes: Drill small holes in the base to let excess water escape and keep the seeds dry. A simple 1/4-inch radius hole should suffice.
Consider the Access: Ensure that openings for the feeder are large enough for birds to access the seeds without difficulty.
Now that you have your design in mind, it’s time to start cutting!
Step-by-Step Construction Process
Step 1: Cutting the Wood
Using your saw, cut the wood pieces according to the dimensions specified. Straight cuts will lead to easier assembly.
Tip: Always measure twice before cutting to ensure accuracy and avoid waste.
Step 2: Sanding the Edges
Use sandpaper to smooth all the edges and surfaces after cutting to remove any splinters. This will make the feeder safe for birds to perch on and feed from.

Step 3: Assembling the Base
Start by laying down the base (10" x 10"). Attach the two side pieces (8" x 10") flush with the edges using wood screws and glue.
Be sure to drill pilot holes first to prevent the wood from splitting during assembly.
Step 4: Attaching the Front and Back
Next, attach the front and back pieces (8" x 8") to the sides, forming a box shape. Ensure each corner is flush for a tight, stable fit.
Step 5: Securing the Roof
Place the two roof pieces (12" x 12") on top of the structure for an overhang that helps protect the feeder from rain and snow. Secure them in place with wood screws.
Step 6: Finishing Touches
To enhance your bird feeder's appearance, finish it by painting or staining with bird-safe options.

Step 7: Adding Drainage Holes
Drill small (1/4-inch) holes in the base to allow for drainage. This keeps seeds dry and fresh.
Placement of Your Bird Feeder
Once your feeder is assembled and finished, the next step is to find the best location to hang or place it.
Choosing the Right Location
Visibility: Place your feeder where you can easily see it from inside your home. Watching birds can be incredibly relaxing.
Safety from Predators: Select a spot away from dense bushes where cats or other predators might hide.
Shelter from the Elements: Position the feeder under some cover or near trees to give birds shelter from harsh weather conditions.
Accessibility: Make sure the feeder is easy to refill without scaring off feeding birds.
Maintaining Your Bird Feeder
Regular maintenance helps keep your bird feeder functional and welcoming throughout the season.
Clean Regularly: Empty the feeder and wash it with warm soapy water to prevent mold and disease. Aim to clean it every few weeks, especially in warmer months when mold can grow quickly.
Refill Frequently: Keep the feeder well-stocked with seeds. During peak feeding times, you may need to refill it every few days. Studies indicate that more frequent refills can increase bird visits by 30%.
Inspect for Damage: Regularly check the wood for wear or damage; repair or replace parts as needed to ensure the feeder remains safe.
Benefits of Attracting Birds to Your Backyard
Building a DIY wooden bird feeder offers numerous benefits beyond merely watching birds:
Environmental Awareness: Attracting birds can foster greater appreciation for local wildlife and biodiversity, leading to advocacy for conservation practices.
Gardening Aid: Birds can help control pests in gardens, eating insects and contributing to a healthier ecosystem.
Education: Regular birdwatching can effectively teach children about species identification, environmental stewardship, and the value of nature.
Crafting Your Backyard Oasis
Creating a DIY wooden bird feeder is not only a satisfying project but also a way to enhance your backyard while helping local bird populations thrive. With just a few materials and some straightforward steps, you’ll design a feeder that is both functional and visually appealing.
So why wait? Gather your materials, unleash your creativity, and start this enjoyable woodworking adventure. You’ll find it rewarding to build a connection with nature and create a haven for delightful feathered friends!

.png)